In the world of music production there’s hardly a tool that’s as essential and yet so often misunderstood as the compressor. Whether you’re just starting out or you’ve been in the game for a while, this compressor tutorial is your key to fully decoding the secrets and power of compression. Get ready to dive deep and learn how to take your tracks to the next level using compressors.
What Is a Compressor?
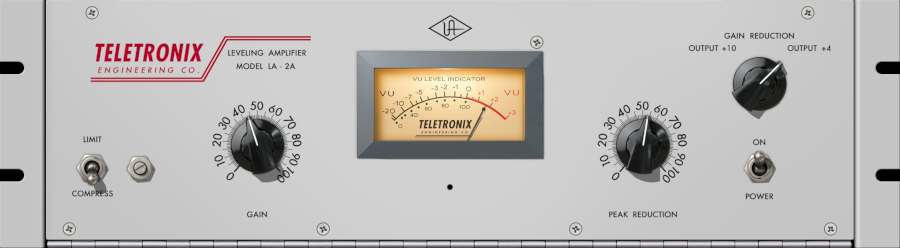
A compressor is a dynamic‑processing audio tool intended to reduce the dynamic range of audio signals. Put simply, it reduces the loud parts of a signal to create a more balanced and consistent sound. Why is this important? Because it helps you make each element in your mix clearly audible without something disappearing or dominating.
How Does a Compressor Work?

A compressor lowers the volume of signals that exceed a certain threshold, via a ratio which determines how strongly these signals are reduced. The goal is to tame the loudest parts of a recording and thereby even out the overall loudness, without losing the quietest components.
Different types of compressors
VCA (Voltage‑Controlled Amplifier) Compressor
These compressors are known for their precision and versatility. They provide fast attack and release times and are ideal for drum‑buses and other percussive elements.
Optical Compressor (Opto)
Optical compressors use a light‑dependent circuit to control compression. They are known for musical and smooth compression, suited for vocals and bass.
FET (Field‑Effect Transistor) Compressor
These units are known for their fast response time and characteristic aggressive sound. They’re excellent for drums, guitars and lead vocals.
Tube Compressor
Tube compressors use vacuum tubes for signal processing and provide a warm, rich sound. They’re ideal for vocals and bass when a certain sound coloration is desired.
Multiband Compressor
This compressor splits the frequency spectrum into multiple bands and compresses each band independently. This is particularly useful in mastering, to control specific frequency ranges without affecting the entire mix.
What is a compressor plugin?

Compressor plugins are digital simulations of hardware compressors, used in a DAW (Digital Audio Workstation). They offer the same functionality as their physical counterparts, but are far more accessible and flexible. With a compressor plugin you can edit your audio files directly on your computer without needing additional hardware.
Do you need to buy a compressor plugin to make music?
No, you don’t have to. Many DAWs come bundled with solid built‑in compressor plugins. But if you want to refine your sound further and achieve specific tonal characteristics, a specialised compressor plugin may well be a worthwhile investment.
Why are compressor plugins indispensable in mixing & mastering?
Because compressors help control dynamics, smooth the mix and increase overall loudness without causing clipping. They’re crucial for achieving a professional, radio‑ready sound.
How Is a Compressor Structured?
Different compressors are usually similarly structured and mainly feature a threshold control to set the point at which the compressor begins to work, as well as a ratio control that determines how strongly the signal is compressed.
Structure and Functions of the FabFilter Pro‑C2

The structure and functioning of a compressor plugin can be excellently illustrated by the example of the FabFilter Pro‑C2. This plugin is popular among both professionals and beginners for its broad adaptability and user‑friendliness. In this guide we will use it to highlight the essential functions crucial for effective compression:
Detailed breakdown of a compressor’s components
A compressor typically includes similar core elements and chiefly consists of:
- A threshold control, which determines the point at which the compression effect begins,
- A ratio control, which defines to what degree the signal above the threshold is compressed.
You’ll often find attack and release controls as well, which govern how quickly the compressor reacts to threshold crossings (attack) and how long it continues to affect the signal after it falls below the threshold (release).
Threshold
The threshold determines at what level the signal gets compressed. Signals exceeding this value are compressed according to the set ratio. A lower threshold setting means more of the signal will be compressed, whereas a higher setting makes the compressor act more selectively.
Ratio
The ratio dictates the amount of compression. A higher ratio means that when the signal exceeds the threshold it will be compressed more strongly. This is useful when you want to limit dynamics aggressively or apply subtle compression effects.
Attack & Release
The attack and release controls manage how fast the compressor responds to signal peaks (attack) and how long it continues to compress once the signal drops beneath the threshold (release). These settings are critical for controlling transients and for achieving a natural‑sounding compression.
Knee
The knee controls the transition between uncompressed and compressed signal. A soft knee provides a gentler transition, while a hard knee makes it more abrupt. This setting enables fine adjustment of the compressor’s character.
How to Use a Compressor Plugin Correctly?
- Place the compressor plugin on the track you want to process.
- Listen carefully to the recording and decide which dynamic range needs adjusting.
- Adjust the threshold value so that the compressor becomes active when the volume is too high.
- Experiment with the ratio to determine how much compression you want.
- Use attack and release settings to control how quickly the compressor reacts to threshold crossings and returns to normal.
Effective use of a compressor demands a good ear and an understanding of how dynamics behave within the context of your track. Start with gentle settings and gradually increase intensity until you find a balance between dynamic control and natural sound.
Tips for Setting Compressor Plugins for Vocals
For vocals a moderate setting is often ideal: a ratio of about 2 : 1 to 4 : 1, a fast‑to‑medium attack, and a medium release help control dynamics while keeping the performance sounding natural.
Expert Tips for Bus Compression in Mixing & Mastering
When compressing group or bus tracks: less is more. A light setting with a low ratio and slow attack can help glue the elements of a group together without compromising their dynamics.
Different Compression Techniques
Downward Compression
This technique reduces the volume of signals that exceed the threshold and is the most common form of compression. It’s used to control peaks and create a more consistent overall volume.
Upward Compression
In this case, the volume of signals below the threshold is increased, which enhances quiet passages and makes the overall mix sound fuller. This technique can be used to bring out details in softer sections.
Multiband Compression
In this case, the volume of signals below the threshold is increased, which enhances quiet passages and makes the overall mix sound fuller. This technique can be used to bring out details in softer sections.
Sidechain Compression
In this case, the volume of signals below the threshold is increased, which enhances quiet passages and makes the overall mix sound fuller. This technique can be used to bring out details in softer sections.
Parallel Compression (New York Compression)
This technique blends the uncompressed signal with a heavily compressed version. This way, the natural dynamics are preserved while increasing loudness and making the mix sound tighter and more powerful.
Keep these tips in mind for professional mixing and mastering
- Too much compression can lead to a flat and lifeless sound. Be mindful of balanced dynamics.
- Consider the context of the full mix rather than just isolated tracks.
- A/B comparisons help determine whether your processing really brings improvement.
- The placement of the compressor in the signal chain influences the result — the order of EQ, compressor and other effects matters.
- Use visual analysis tools to better understand how the compressor is acting on the signal.
Control Dynamics Already During Recording with Outboard Gear
Outboard compressors can be used during recording to control dynamics at the source. This can be especially useful to avoid clipping and to shape the sound directly at the point of origin.
Our Conclusion
Compressors are indispensable tools in music production and audio post‑production — they help you control, limit or expand dynamics. With the right techniques and some high‑quality compressor plugins you can ensure your productions achieve a professional sound.
Recommended Compressor Plugins for Mixing & Mastering
Why Should You Purchase Compressor Plugins?
Investing in high‑quality compressor plugins can pay off because they might offer specific tonal colourations or advanced functions that stock plugins don’t have, thus enabling more professional results.
What Should You Look for When Buying a Compressor Plugin?
Above all, consider usability and compatibility. A good compressor plugin should integrate seamlessly into your workflow and ideally include additional features such as tonal colouring or oversampling.
Where Can I Buy Compressor Plugins?
Compressor plugins are typically available from manufacturer websites and specialist retailers (including Thomann and Plugin Boutique) in VST, AU and AAX formats. Try demo versions to test compatibility with your DAW and workflow.
Where can I buy Compressor plugins?
We recommend buying your compressor plugins from Plugin Boutique. You’ll find a huge range of options from simple, budget-friendly tools to advanced mastering-grade compressors plus frequent deals, bundle offers and an easy-to-use license manager for a smooth and hassle-free buying experience.